Note: If you want to directly access the script, please visit this link.
I like reading books and writing reviews on Goodreads. And I wanted to create a year-end blog post to share those books and reviews. However, copy-pasting all these reviews from Goodreads didn’t seem like a good idea - especially if you want to repeat the task every year.
What’s the obvious answer to avoid repetition? Well, if you’re a programmer, it’s automation. Moreover, this seemed like a nice little project to learn web scraping. So, I wrote a python script to automate this task. This blog expands upon my learnings and explains the script in detail.
Note that I am using python3 in this script.
The script is divided into 4 major chunks.
These four steps are represented by the respective functions in the main scope.
1
2
3
4
5
6
7
8
9
10
if __name__ == '__main__':

    html_str = get_html_using_selenium(MAIN_URL)

    book_list = get_books_data(html_str)

    filtered_and_sorted_book_list = filter_and_sort_books(book_list, YEAR)

    create_markdown(filtered_and_sorted_book_list, YEAR, INTRO_PARA_OF_BLOG,
                    OUTPUT_MD_FILE_PATH)
1
2
3
 from selenium import webdriver
 import time
 from bs4 import BeautifulSoup
The Selenium package is used to automate web browser interaction with python. We will use it to open and scroll the Goodreads page in an automated way.
time is the standard python library that will be used to enact delays in scrolling.
BeautifulSoup is a python library to scrap data from web pages.
1
2
3
4
5
 YEAR = '2020'
 OUTPUT_MD_FILE_PATH = 'markdown_file.md'
 INTRO_PARA_OF_BLOG = f'{YEAR} was a good reading year for me. The Covid induced work-from-home saved ample travel hours for me to fall in love with reading again. Here are the books that I read this year - some of them were delightful; others not so much.\n'
 CHROME_DRIVER_PATH = '/full/path/to/downloaded/chromedriver'
 MAIN_URL = 'https://www.goodreads.com/review/list/13487053-ankit-modi?order=d&ref=nav_mybooks&shelf=read&sort=date_read&utf8=%E2%9C%93'
YEAR is the year for which you want to create your blog for.
OUTPUT_MD_FILE_PATH is the path where you want to dump your markdown blog file.
INTRO_PARA_OF_BLOG is the string that becomes the first paragraph of your markdown (md) blog. You can also edit this paragraph directly in the resultant md file.
CHROME_DRIVER_PATH is the path of the chromedriver to be used by selenium. Download the latest version from here and assign the full path of the downloaded file to this variable.
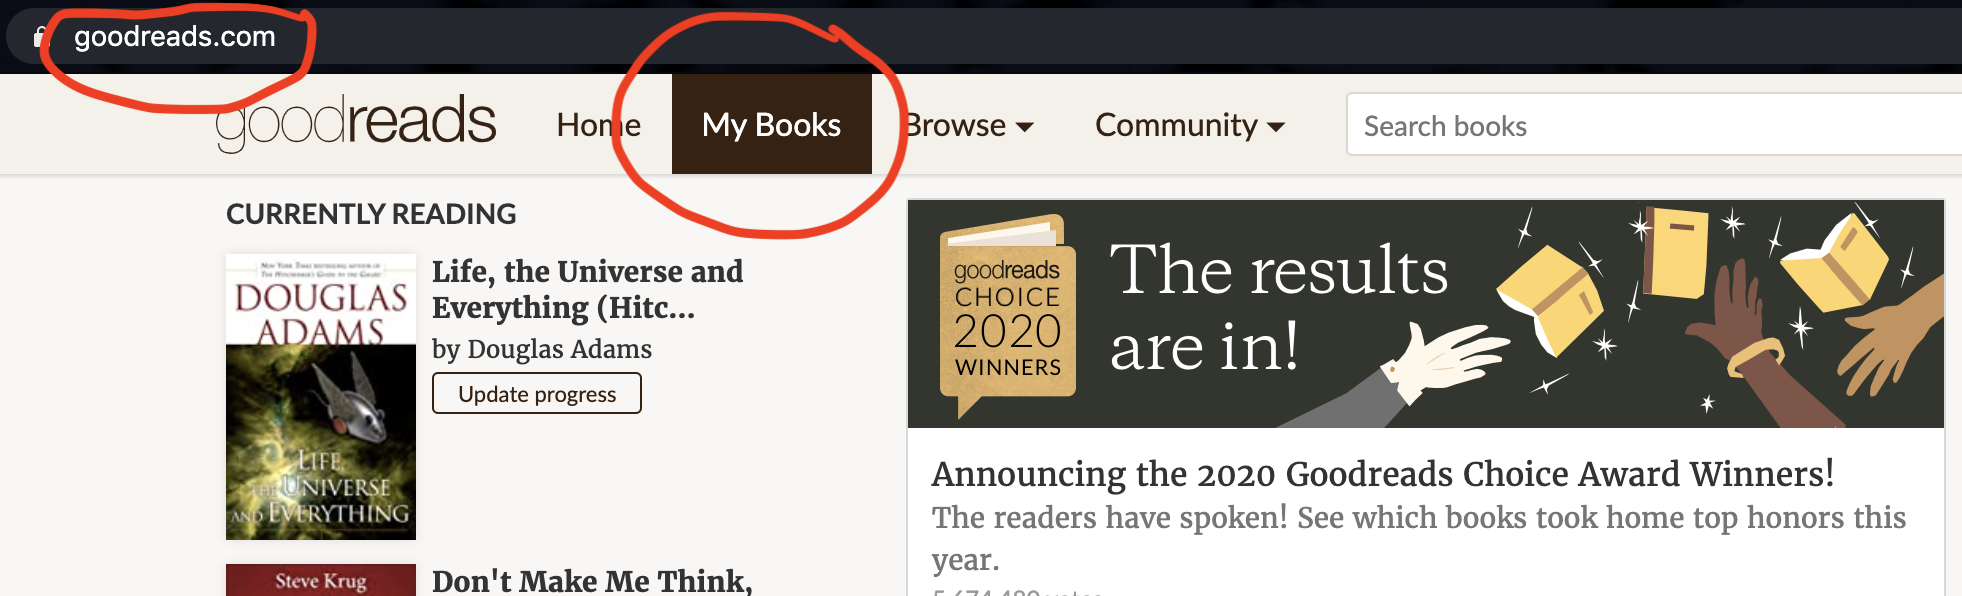
MAIN_URL is the URL that we need to open in selenium. Follow the following steps to generate a similar URL for your profile:
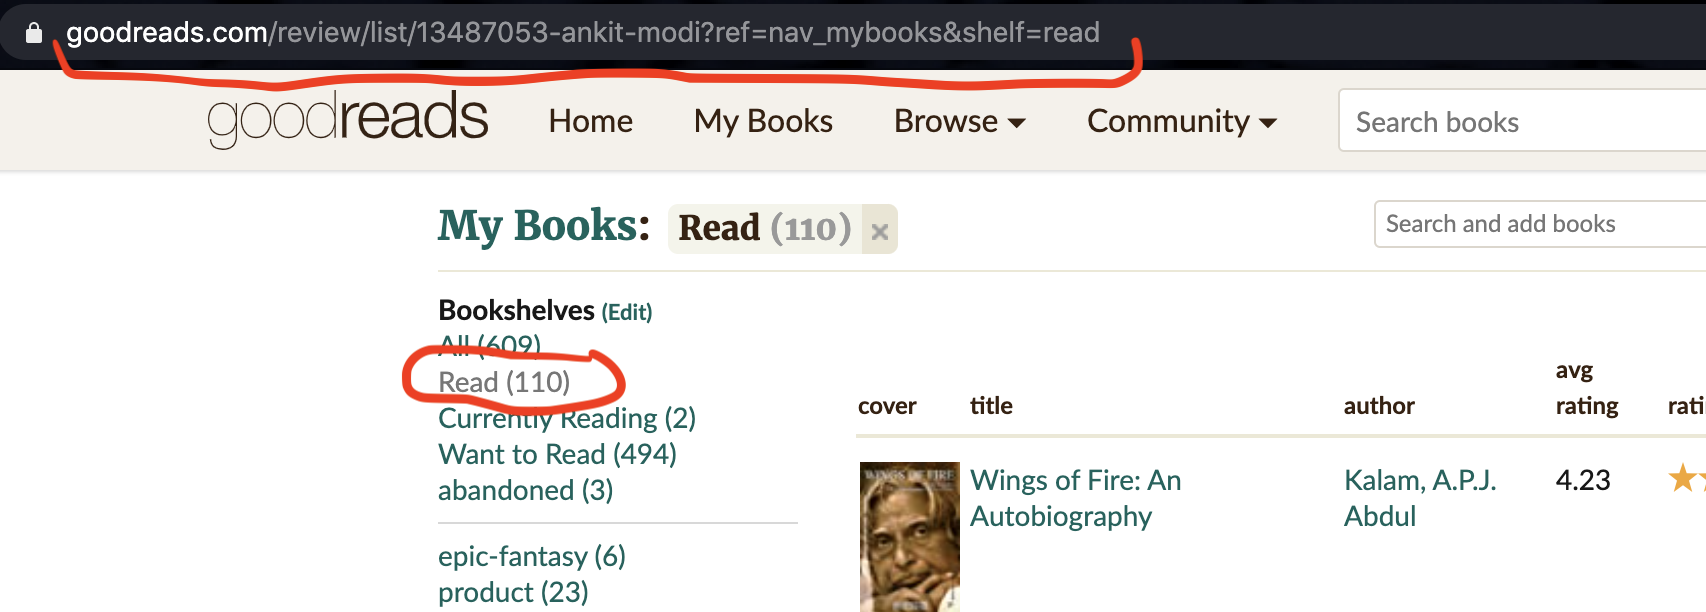

Notice how the URL is changing while following these steps. Copy the final URL and assign it to the MAIN_URL variable.
Now that we have seen the imports and variable names, let’s move on to the meat of the code.
Following is the code snippet for this function:
1
2
3
4
5
6
7
8
9
10
11
12
13
14
15
16
17
18
19
20
def get_html_using_selenium(url, CHROME_DRIVER_PATH):

    driver = webdriver.Chrome(executable_path=CHROME_DRIVER_PATH)
    driver.get (url)

    # handle infinite scroll
    lenOfPage = driver.execute_script("window.scrollTo(0, document.body.scrollHeight);var lenOfPage=document.body.scrollHeight;return lenOfPage;")
    match = False
    while(match==False):
        lastCount = lenOfPage
        time.sleep(3)
        lenOfPage = driver.execute_script("window.scrollTo(0, document.body.scrollHeight);var lenOfPage=document.body.scrollHeight;return lenOfPage;")
        if lastCount==lenOfPage:
            match=True

    # Page is fully scrolled now. Next step is to extract the source code from it.
    my_html = driver.page_source
    driver.quit()

    return my_html
Line 2-4 will start a chrome session using the chrome driver and open the Goodreads URL.
Line 7-14 is used to handle the infinite scroll of the Goodreads page. Line 7 stores the current length of the page. The while loop starting at line 9 scrolls down to the bottom of the page and waits for 3 seconds for the remaining book list to load. It measures the length of the page after the wait and checks if the length has increased. If not, the loop is exited.
Line 17 stores the source code of the page.
Line 18 exits the chrome driver and line 20 returns the source code.
Following is the code snippet for this function:
1
2
3
4
5
6
7
8
9
10
11
12
13
14
15
16
17
18
19
20
21
22
23
24
25
26
27
28
29
30
31
32
33
34
35
36
37
38
39
40
41
42
43
44
45
46
47
48
49
50
51
52
53
54
55
56
57
58
59
60
61
62
63
64
65
def get_rating_from_text(rating_text):
    rating_dict = {'did not like it': '1',
                   'it was ok': '2',
                   'liked it': '3',
                   'really liked it': '4',
                   'it was amazing': '5'}

    return rating_dict[rating_text]


 def get_books_data(html_str):
    soup = BeautifulSoup(html_str, 'lxml')

    table = soup.find_all('table', {'id':'books'})[0]
    table_rows = table.find_all('tr')
    book_list = []

    for tr in table_rows[1:]:
        book_dict = {}

        # parse cover_url
        td = tr.find_all('td', {'class':'field cover'})[0]
        img = td.find_all('img')[0]
        book_dict['cover_url'] = img['src']

        # parse title and book's url
        td = tr.find_all('td', {'class':'field title'})[0]
        a_link = td.find_all('a')[0]
        book_dict['title'] = a_link.get('title')
        book_dict['book_url'] = a_link.get('href')

        # parse author and author_url
        td = tr.find_all('td', {'class':'field author'})[0]
        a_link = td.find_all('a')[0]
        book_dict['author_name'] = a_link.text
        book_dict['author_url'] = a_link.get('href')

        # parse rating
        td = tr.find_all('td', {'class':'field rating'})[0]
        span = td.find_all('span', {'class':'staticStars notranslate'})[0]
        rating_text = span.get('title')
        rating = get_rating_from_text(rating_text)
        book_dict['rating'] = rating

        # parse review
        review = ''
        td = tr.find_all('td', {'class':'field review'})
        if(len(td) > 0):
            td = td[0]
            span = td.find_all('span')
            if(len(span) > 0):
                span = span[-1]
                lines = [str(i) for i in span.contents]
                review = ' '.join(lines)
        book_dict['review'] = review

        # parse date_read
        td = tr.find_all('td', {'class':'field date_read'})[0]
        span = td.find_all('span', {'class':'date_read_value'})[0]
        date_read = span.text
        book_dict['date_read'] = date_read

        book_list.append(book_dict)

    return book_list
Line 1-8 is a function to convert ratings from strings to numbers. The Html source code of the Goodreads page has the ratings represented by these strings. The function get_rating_from_text() will convert them to their corresponding numeric value. This function is used in line 42.
Line 11 defines the function to get the book data from the source code.
Line 12 consumes the Html source code to return a BeautifulSoup object.
By observing the Html source closely (see the picture below), we can see that most of the book-related data is stored in a table whose id is ‘books’. We extract that table in line 14.
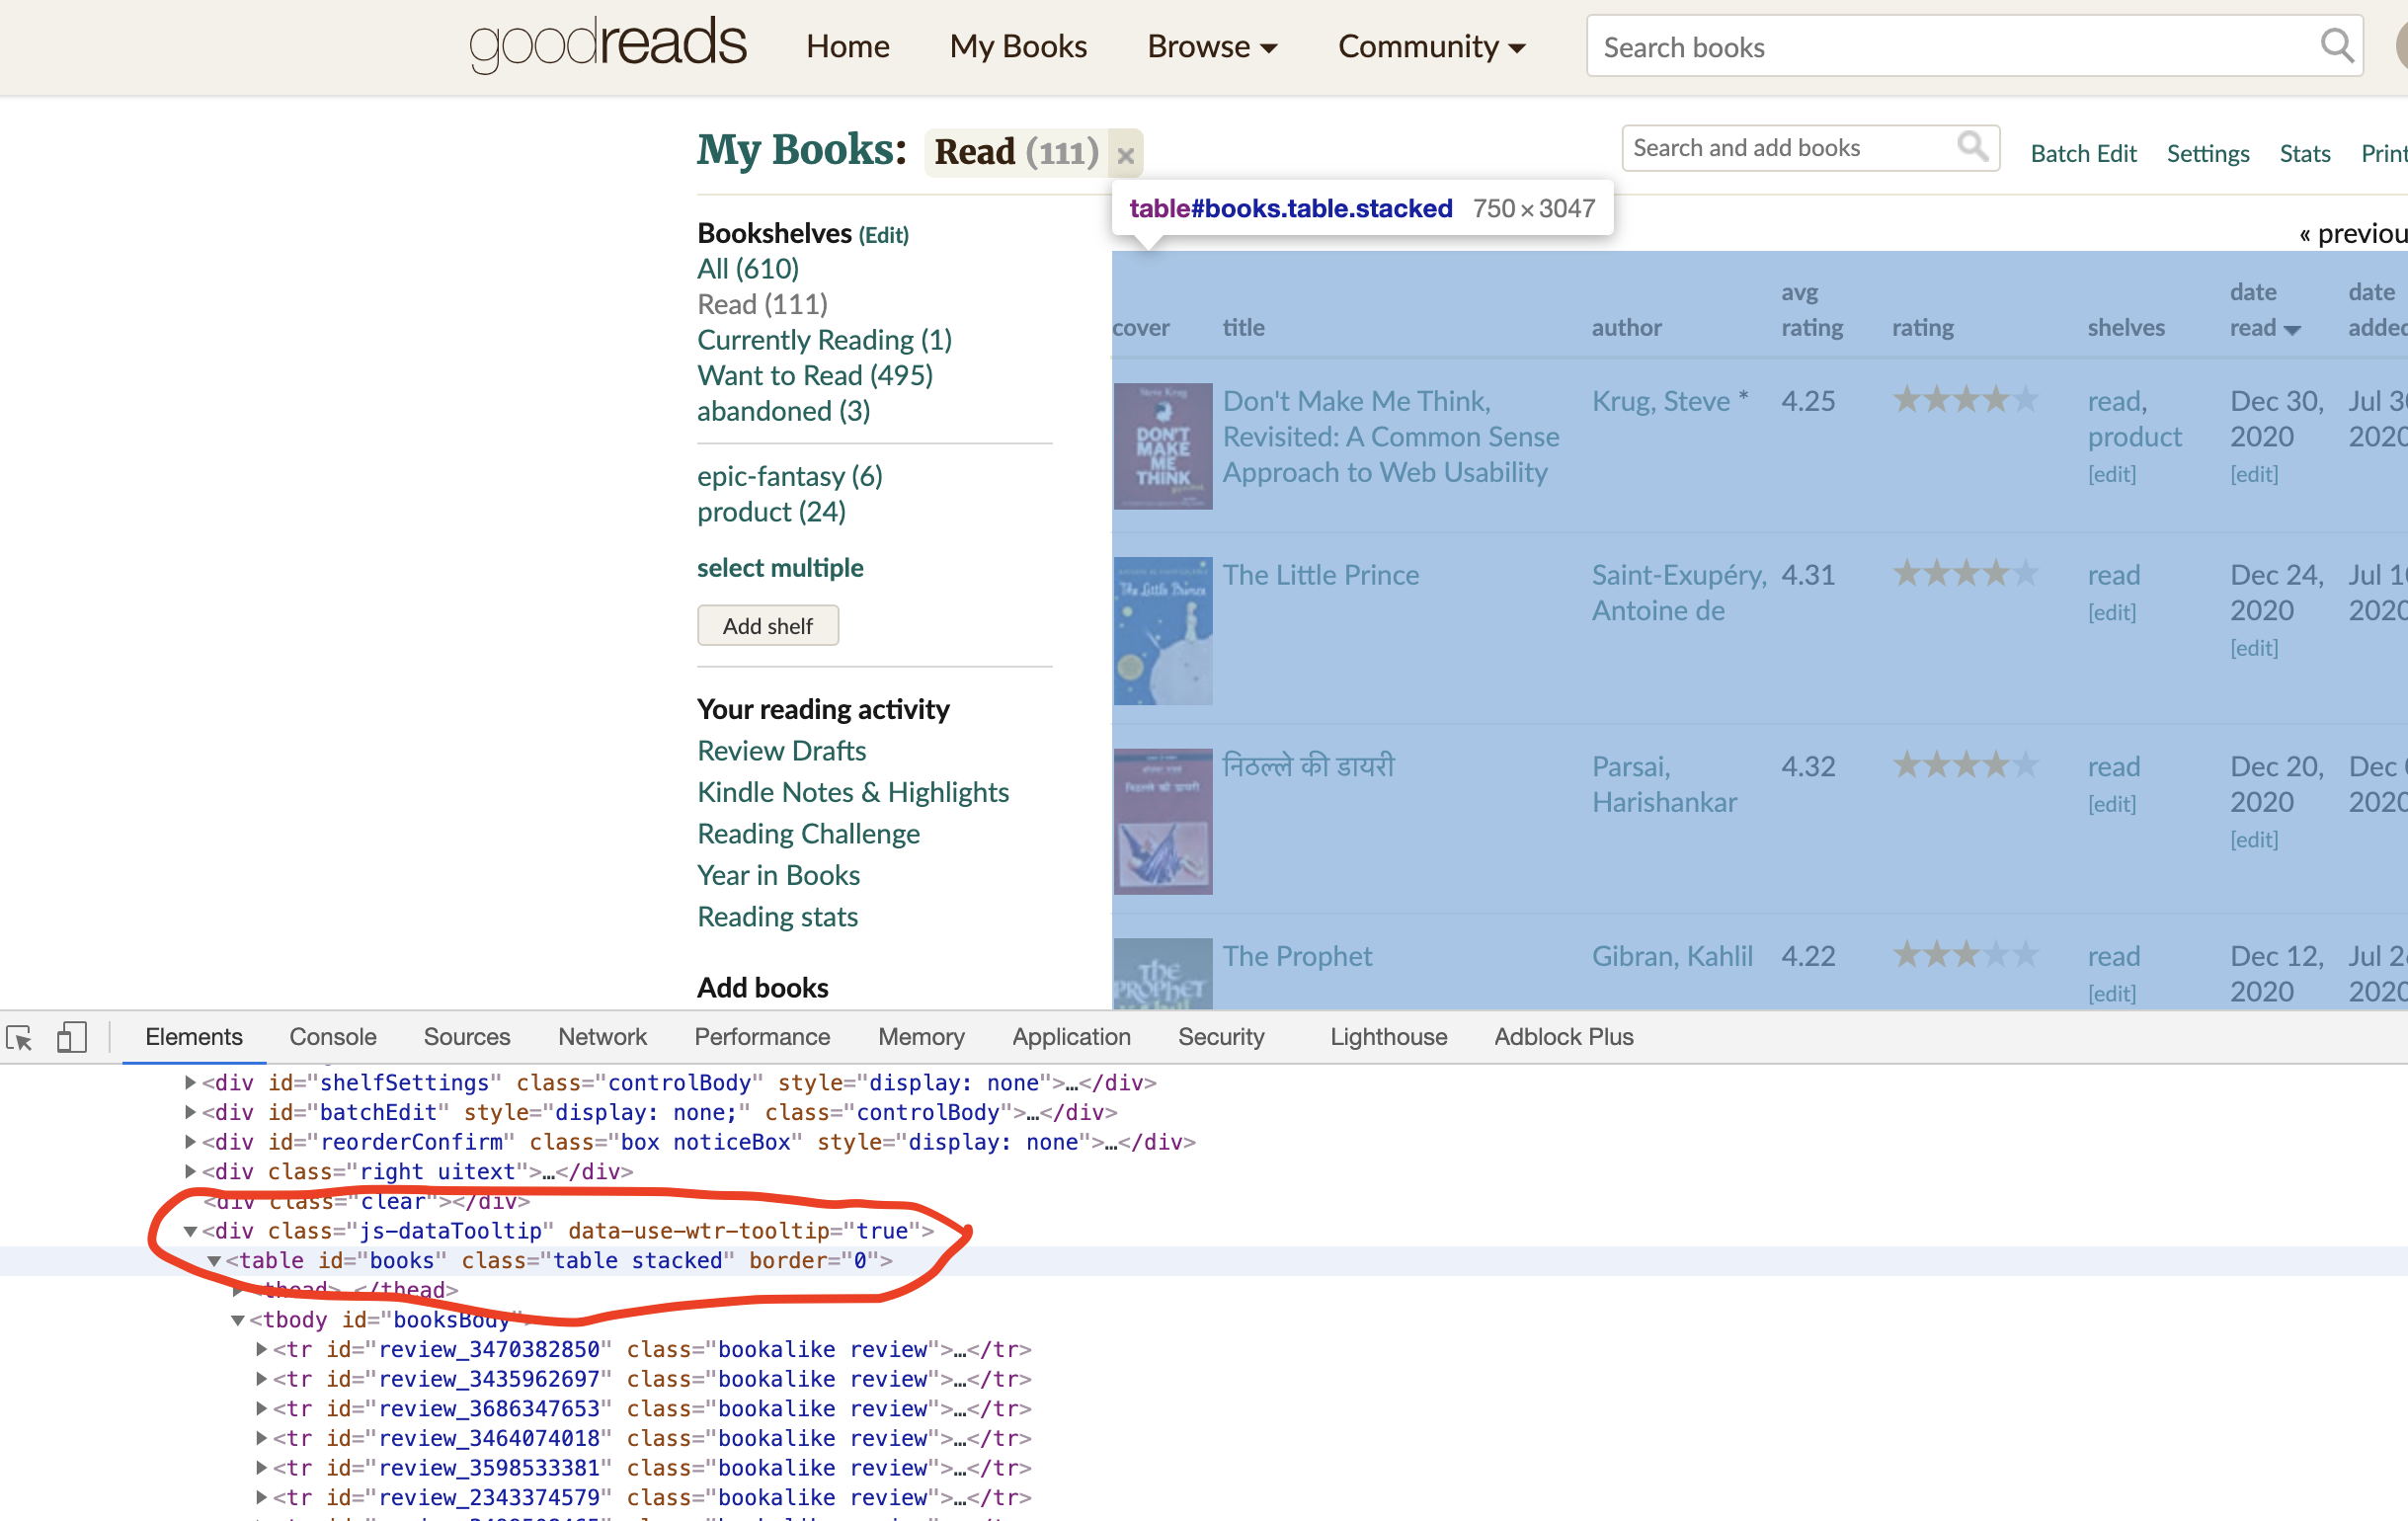
Further, we extract all the rows from the table in line 15. We initialize book_list to store all the extracted data in line 16.
In line 18-63, we loop over all the rows/ books, create a dictionary to store data related to each book, and append that dictionary to the book_list.
Line 21-24 extracts the cover URL. Let’s understand that piece of code. The rest of the code snippet works similarly to extract the title, book’s URL, author name, etc. Let’s look at the data format in the Html source code.
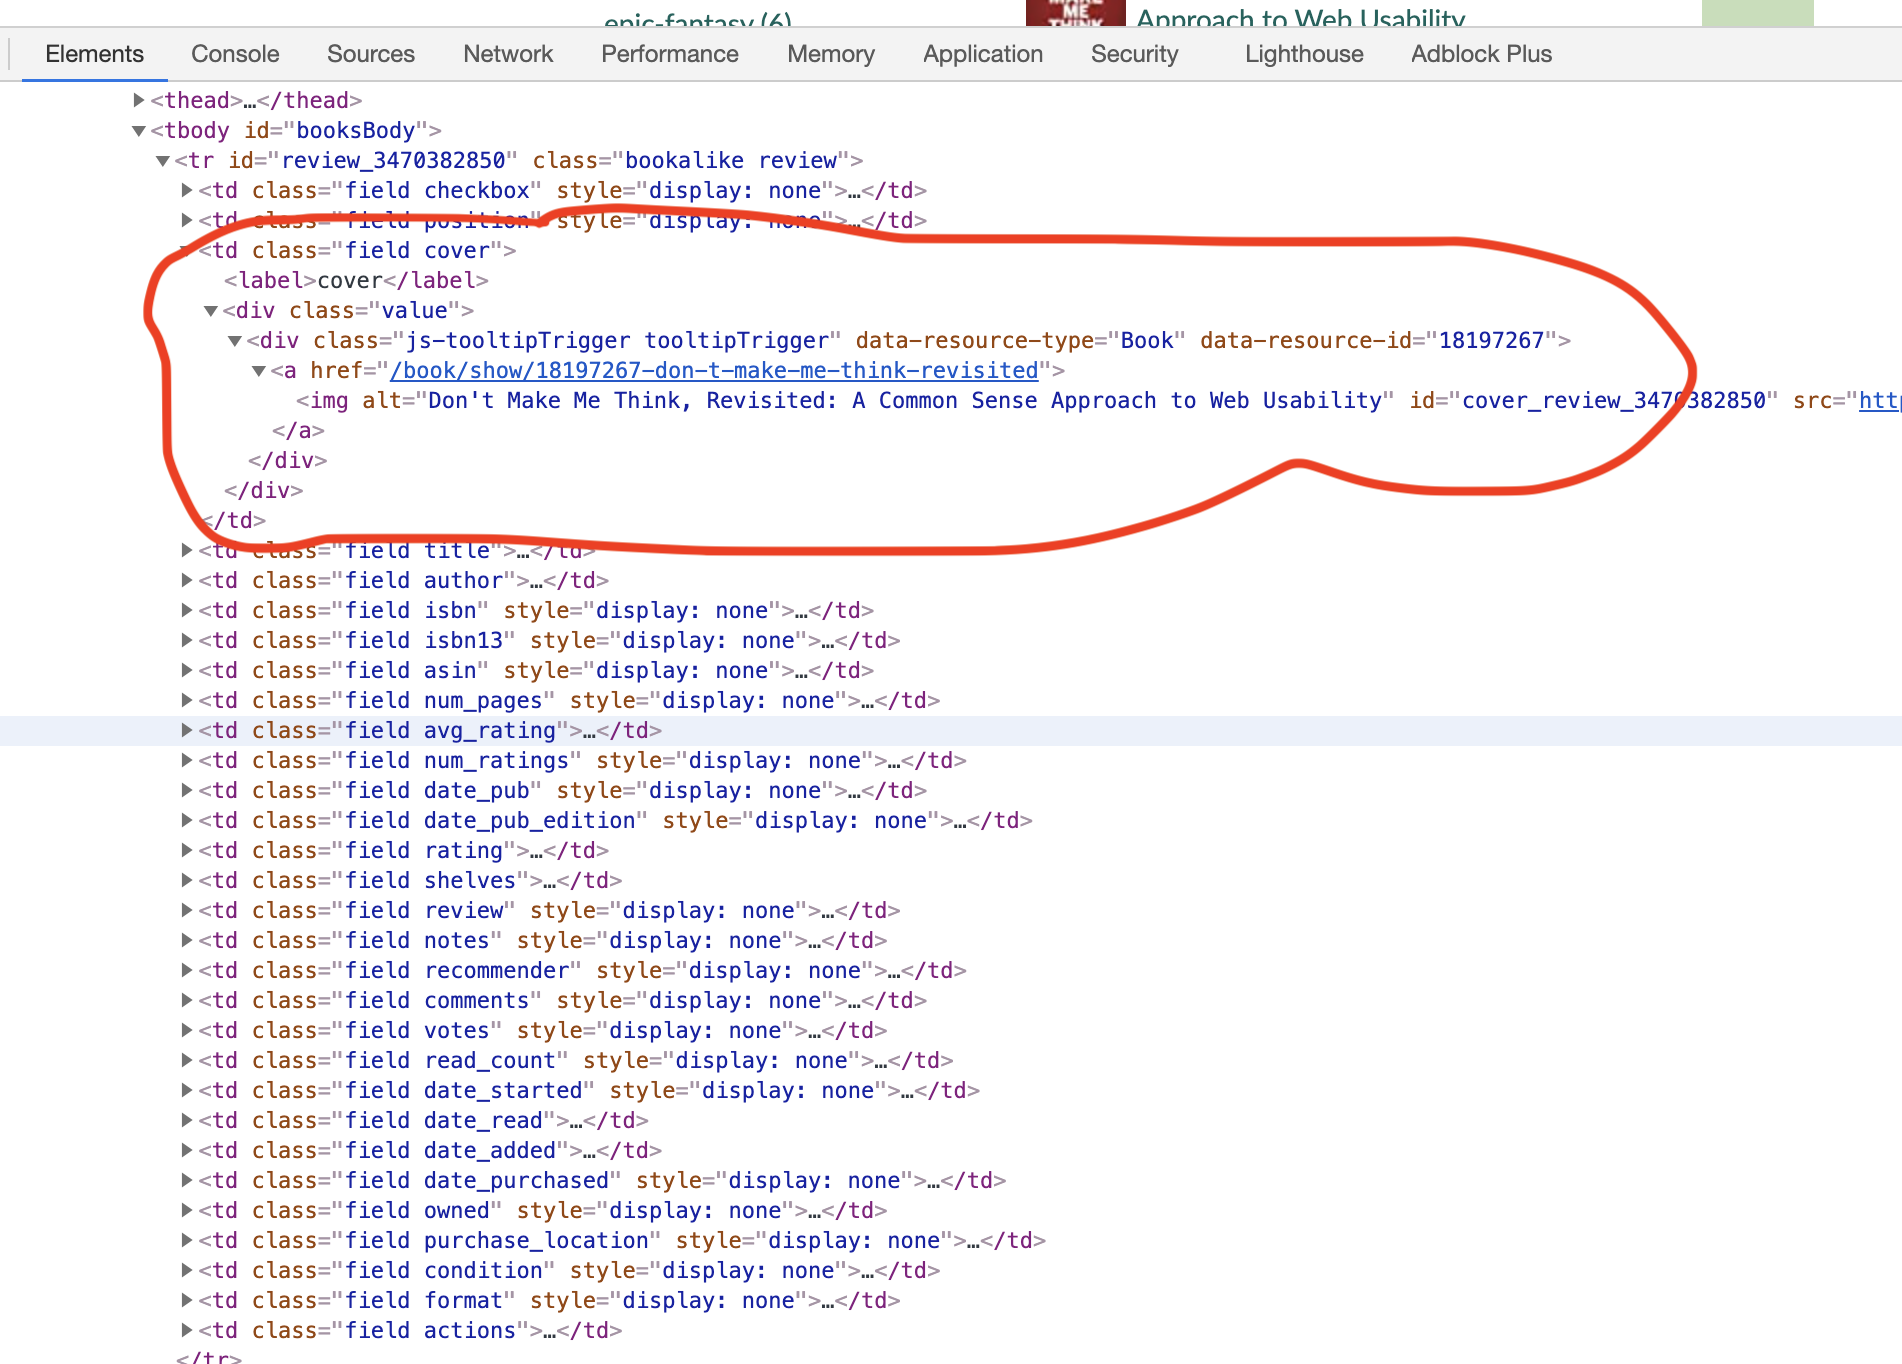
We can see that each book has multiple td objects (cover, title, author, etc.). Line 22 takes the current book’s tr object and finds the first td objects with class ‘cover’ in it. Line 23 extracts the first img tag from the td object. Line 24 extracts the image source (URL) and puts it in book_dict. We do similar extractions for the rest of the required fields.
The next step is to filter the books of the required year which is 2020 in this case (see variable YEAR). Following is the code snippet for this function:
1
2
3
4
 def filter_and_sort_books(book_list, year):
     filtered_list = [i for i in book_list if year in i['date_read']]
     sorted_list = sorted(filtered_list, key=lambda k: k['rating'], reverse=True)
     return sorted_list
Line 2 filters the list for the books read in 2020.
Line 3 sorts the filtered list by the reader’s ratings.
Our next function will consume the filtered & sorted book data and generate the markdown file that we can directly use in our jekyll blog. Here is the code snippet for this function:
1
2
3
4
5
6
7
8
9
10
11
12
13
14
15
16
17
18
19
20
21
22
23
24
25
26
27
28
29
30
31
32
33
34
35
36
37
38
39
40
41
42
43
44
45
def create_markdown(filtered_and_sorted_book_list, year, intro_para,
md_file_path):
url_prefix = 'https://www.goodreads.com/'
with open(md_file_path, 'w') as f:
f.write('---\n')
f.write('layout: post\n')
f.write(f'title: My Year in Books - {year}\n')
f.write('---\n')
f.write(f'{intro_para}\n')
# loop over book list and create md paragraphs for each book
for i in range(len(filtered_and_sorted_book_list)):
curr_book = filtered_and_sorted_book_list[i]
# title, book_url
book_url = url_prefix + curr_book['book_url']
f.write(f"### <a href='{book_url}' target='_blank'>{i+1}. {curr_book['title']}</a>\n")
#cover_url
small_cover_url = curr_book['cover_url']
basename = small_cover_url.split('/')[-1]
s = basename.index('._')
e = basename.index('_.') + 1
new_basename = basename[:s] + basename[e:]
big_cover_url = small_cover_url.replace(basename, new_basename)
f.write(f"" + "{: height='300' width='200px' style='float:left; padding-right:20px; padding-bottom:5px; padding-top:5px' }\n")
# author_name, author_url
author_str = curr_book['author_name']
author_arr = [i.strip() for i in author_str.split(',')]
author_name = ' '.join(author_arr[::-1])
author_url = url_prefix + curr_book['author_url']
f.write(f"Author: <a href='{author_url}' target='_blank'>_{author_name}_</a>\n")
f.write('<br>\n')
# my rating
f.write(f"My rating: ___{curr_book['rating']} out of 5 stars___\n")
f.write('<br><br>\n')
# review
f.write(curr_book['review'] + '\n')
f.write('<br clear="all"><br>\n\n\n\n')
print('Markdown created !!')
Line 5-11 opens the markdown file from the provided path and writes the blueprint of a Jekyll blog (layout, title, initial paragraph)in it.
We loop over the book list in Line 13-43 and create the markdown paragraph for each book. Here’s a screenshot to show how each book paragraph looks like:

Line 14 assigns the current book dictionary to curr_book variable.
Line 17-18 adds the book heading with its URL pointing to its Goodreads link.
Line 21-27 extracts the link for the cover page and places it on the left side as shown in the picture above.
Line 30-35 adds the author’s name and links it to his/her Goodreads page as shown in the top right part of the above image.
Line 38-39 adds My rating just below the author’s name as shown in the image.
Line 42-43 adds the review below it.
These paragraphs are created for each book in the book_list.
That’s it. Your markdown file is created. The file is ready to be copied and pasted in your Jekyll blog (typically inside the _posts folder). See this blog for the final output. You’re set to share your books and reviews with your friends now!
Keep reading & keep sharing!
Written on January 9, 2021